oc new-project workshop-multitiered-YourName
6 Deploy a Multi-Tiered App
Deploy Multi-tiered Application
Introduction
In this lab we will learn to deploy a multi-tiered application on OpenShift. This will be a typical three tier application with database, backend component and a frontend component.
Deploy a Database
Create a new project
| Substitute YourName with your name below |
We will use MongoDB. You can deploy MongoDB using command line as follows:
oc new-app mongodb-ephemeral \
-l app.openshift.io/runtime=mongodb,\
app.kubernetes.io/part-of=multi-tiered-app
-
app.openshift.io/runtime=mongodbis a label to display runtime icon on webconsole -
app.kubernetes.io/part-of=multi-tiered-appdisplays the deployment as part of an application grouping calledmulti-tiered-appon web console
Or you can also use WebConsole and select Mongodb Ephemeral from the developer catalog
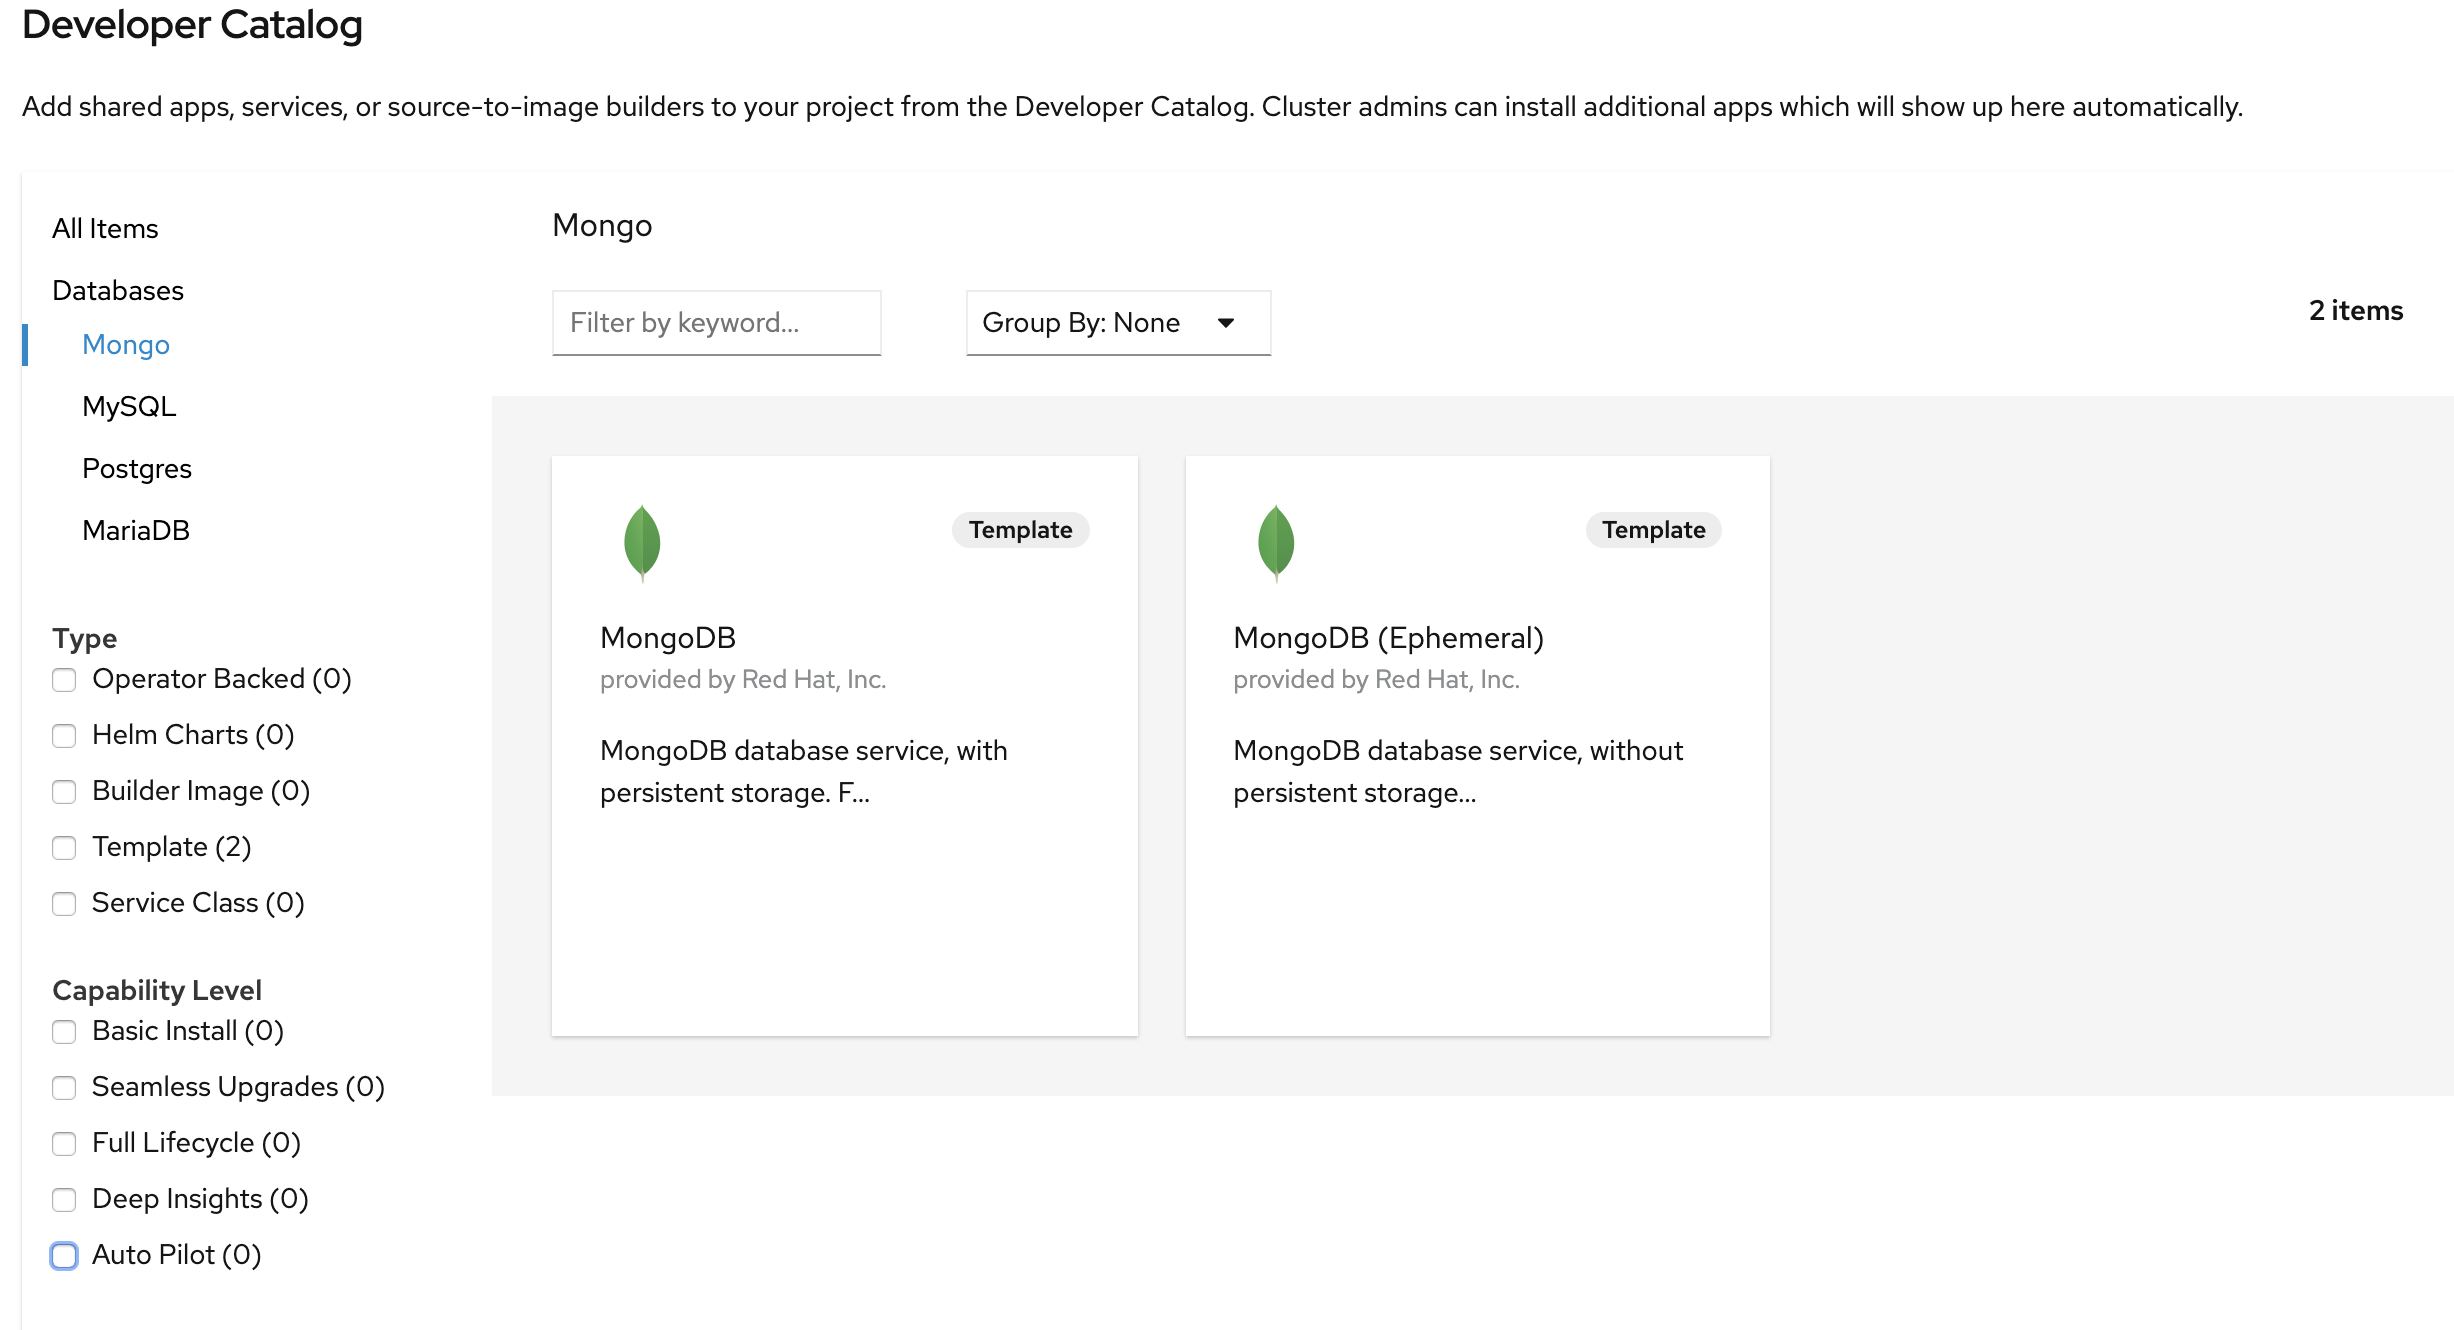
This will deploy the database and also create a secret that has credentials to connect to the database. Note the name of that secret as we will be using that with our backend application to connect to the database.
..
..
..
--> Creating resources with label app.kubernetes.io/part-of=multi-tiered-app,app.openshift.io/runtime=mongodb ...
    secret "mongodb" created (1)
    service "mongodb" created (2)
    deploymentconfig.apps.openshift.io "mongodb" created (3)
--> Success
    Application is not exposed. You can expose services to the outside world by executing one or more of the commands below:
     'oc expose svc/mongodb'
    Run 'oc status' to view your app.
| 1 | this is the database secret that we will inject into our backend app later |
| 2 | this is the database service |
| 3 | this is the deploymentconfig |
Once deployed, you have the first tier of the 3-tier app deployed that shows up on the web console as

Deploy Backend Application
Now we will deploy the backend application by running the following commands. The first command deploys the application and the second one applies an annotation to visually show connection to the database on the web console.
| You can deploy this from web console by browsing through the the catalog and supplying the source code URL as input and selecting the runtime. |
oc new-app https://github.com/RedHatWorkshops/openshiftv4-odo-workshop-backend.git \
--name=kiosk-backend \
-l app.openshift.io/runtime=nodejs,\
app.kubernetes.io/part-of=multi-tiered-app

oc annotate deployment/kiosk-backend app.openshift.io/connects-to=mongodb
-
app.openshift.io/runtime=nodejsis a runtime label to display icon on web console -
app.kubernetes.io/part-of=multi-tiered-appis a label to make app part-of application group -
app.openshift.io/connects-to=mongodbis an annotation to display connectivity between backend and database
This will start openshift S2I build for your backend application. The build will run for a few mins.
..
..
--> Creating resources with label app.kubernetes.io/part-of=multi-tiered-app,app.openshift.io/runtime=nodejs ...
    imagestream.image.openshift.io "kiosk-backend" created
    buildconfig.build.openshift.io "kiosk-backend" created
    deployment.apps "kiosk-backend" created
    service "kiosk-backend" created
--> Success
    Build scheduled, use 'oc logs -f bc/kiosk-backend' to track its progress.
    Application is not exposed. You can expose services to the outside world by executing one or more of the commands below:
     'oc expose svc/kiosk-backend'
    Run 'oc status' to view your app.
Once deployed, you will need to patch the resource limits for the Build:
## Select the project
$ oc project <Your Project>

## Now we need to find the builds
$ oc get builds

NAME              TYPE     FROM   STATUS    STARTED         DURATION
kiosk-backend-1   Source   Git    Running   5 seconds ago

## If the build is still running, cancel it first:
$ oc cancel-build kiosk-backend

## Afterwards, we need to patch the BuildConfig, which is the name of the build without the "-1"
$ oc patch bc/kiosk-backend --patch '{"spec":{"resources":{"limits":{"memory":"1Gi","cpu":"1000m"}}}}'

## Now, start a new build
$ oc start-build kiosk-backend

## You can check it's status again by running oc get builds
$ oc get builds
NAME              TYPE     FROM          STATUS                       STARTED          DURATION
kiosk-backend-1   Source   Git@c08f65c   Cancelled (CancelledBuild)   49 seconds ago   18s
kiosk-backend-2   Source   Git@c08f65c   Running                      4 seconds ago
You can watch build logs either using web console or via command line oc logs build/kiosk-backend-2
In the meanwhile, we will patch the deployment configuration to add environment variables that reference the database secret. This is required for your backend application to make a service connection to the database.
oc patch deployment/kiosk-backend --type='json' -p='[{"op": "add", "path": "/spec/template/spec/containers/0/env", "value": [ { "name": "username", "valueFrom": { "secretKeyRef": { "name": "mongodb", "key": "database-user" } } },{ "name": "password", "valueFrom": { "secretKeyRef": { "name": "mongodb", "key": "database-password" } } },{ "name": "database_name", "valueFrom": { "secretKeyRef": { "name": "mongodb", "key": "database-name" } } },{ "name": "admin_password", "valueFrom": { "secretKeyRef": { "name": "mongodb", "key": "database-admin-password" } } } ] }]'
Applying this patch will add the following to the deployment configuration. You can check the deployment configuration by running oc get dc/kiosk-backend -o yaml.
    spec:
      containers:
      - env:
        - name: username
          valueFrom:
            secretKeyRef:
              key: database-user
              name: mongodb
        - name: password
          valueFrom:
            secretKeyRef:
              key: database-password
              name: mongodb
        - name: database_name
          valueFrom:
            secretKeyRef:
              key: database-name
              name: mongodb
        - name: admin_password
          valueFrom:
            secretKeyRef:
              key: database-admin-password
              name: mongodb
This configuration creates the secret mappings and assigns respective values from the secrets to the environment variables when the container starts running.
| env variable | key from secret |
|---|---|
username |
database-user |
password |
database-password |
database_name |
database-name |
admin_password |
database-admin-password |
Once deployed, you have the 1st and 2nd tiers of the 3-tier app deployed that shows up on the web console as

Deploy Frontend
Let us now deploy the frontend component. While creating the frontend we will also link this to the backend component that we deployed in the last step by passing the environment variables that point to the backend service.
| You can deploy this from web console by browsing through the the catalog and supplying the source code URL as input and selecting the runtime. |
# Get the backend hostname (NAME) and port (PORT(S)):
oc get service kiosk-backend

NAME            TYPE        CLUSTER-IP     EXTERNAL-IP   PORT(S)    AGE
kiosk-backend   ClusterIP   172.30.47.49   <none>        8080/TCP   8m9s

BACKEND_NAME=kiosk-backend
BACKEND_PORT=8080

oc new-app https://github.com/RedHatWorkshops/openshiftv4-odo-workshop.git \
--name=kiosk-frontend \
-l app.openshift.io/runtime=nodejs,\
app.kubernetes.io/part-of=multi-tiered-app \
-e COMPONENT_BACKEND_HOST=$BACKEND_NAME \
-e COMPONENT_BACKEND_PORT=$BACKEND_PORT

oc annotate deployment/kiosk-frontend app.openshift.io/connects-to=kiosk-backend
-
COMPONENT_BACKEND_HOSTis an env variable that points to backend service -
COMPONENT_BACKEND_PORTis an env variable that points to backend service port -
app.openshift.io/connects-to=kiosk-backendis an annotation to show connection from frontend component to backend on the web console
oc get svc kiosk-backend --template= provides service name and
oc get svc kiosk-backend -o=jsonpath='{ .spec.ports[?(@.name == "8080-tcp")].targetPort }' gives you the service port. You can find these values by running oc get svc kiosk-backend directly and substitute those values. The above line shows how you can script it all into one line.
|
Once deployed, we need to patch the resource limits for the build:
## Select the project
$ oc project <Your Project>

## Now we need to find the builds
$ oc get builds

NAME               TYPE     FROM          STATUS                       STARTED         DURATION
kiosk-backend-1    Source   Git@c08f65c   Cancelled (CancelledBuild)   5 minutes ago   18s
kiosk-backend-2    Source   Git@c08f65c   Complete                     4 minutes ago   1m0s
kiosk-frontend-1   Source   Git           Running

## If the build is still running, cancel it first:
$ oc cancel-build kiosk-frontend

## Afterwards, we need to patch the BuildConfig, which is the name of the build without the "-1"
$ oc patch bc/kiosk-frontend --patch '{"spec":{"resources":{"limits":{"memory":"1Gi","cpu":"1000m"}}}}'

## Now, start a new build
$ oc start-build kiosk-frontend

## You can check it's status again by running oc get builds
$ oc get builds
NAME               TYPE     FROM          STATUS                       STARTED          DURATION
kiosk-backend-1    Source   Git@c08f65c   Cancelled (CancelledBuild)   5 minutes ago    18s
kiosk-backend-2    Source   Git@c08f65c   Complete                     5 minutes ago    1m0s
kiosk-frontend-1   Source   Git@caf228f   Cancelled (CancelledBuild)   42 seconds ago   14s
kiosk-frontend-2   Source   Git@caf228f   Running                      8 seconds ago
Create a route to expose your frontend component via openshift router.
oc expose svc kiosk-frontend
| We did not expose our backend application to create an openshift route. This is because it would be accessed only within the openshift cluster. So, you would only want to expose those services that need to be accessed from outside the cluster. |
Once done, you have all 3 tiers of your app deployed that shows up on the web console as

Test App
Now test the application by accessing its URL. You can get the URL by running
oc get route kiosk-frontend
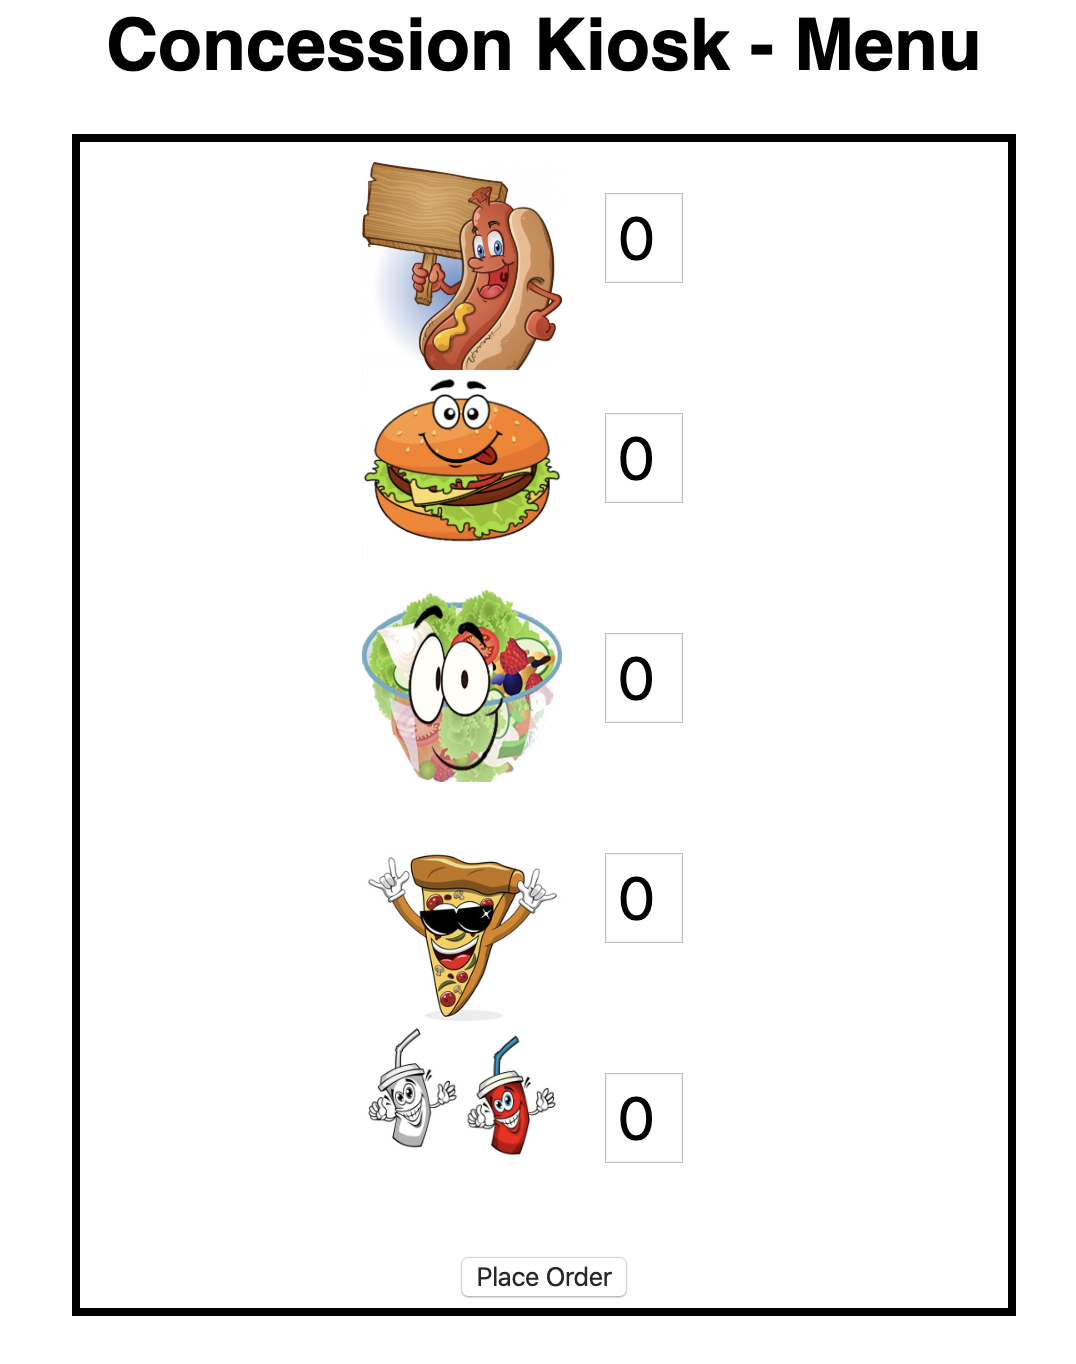
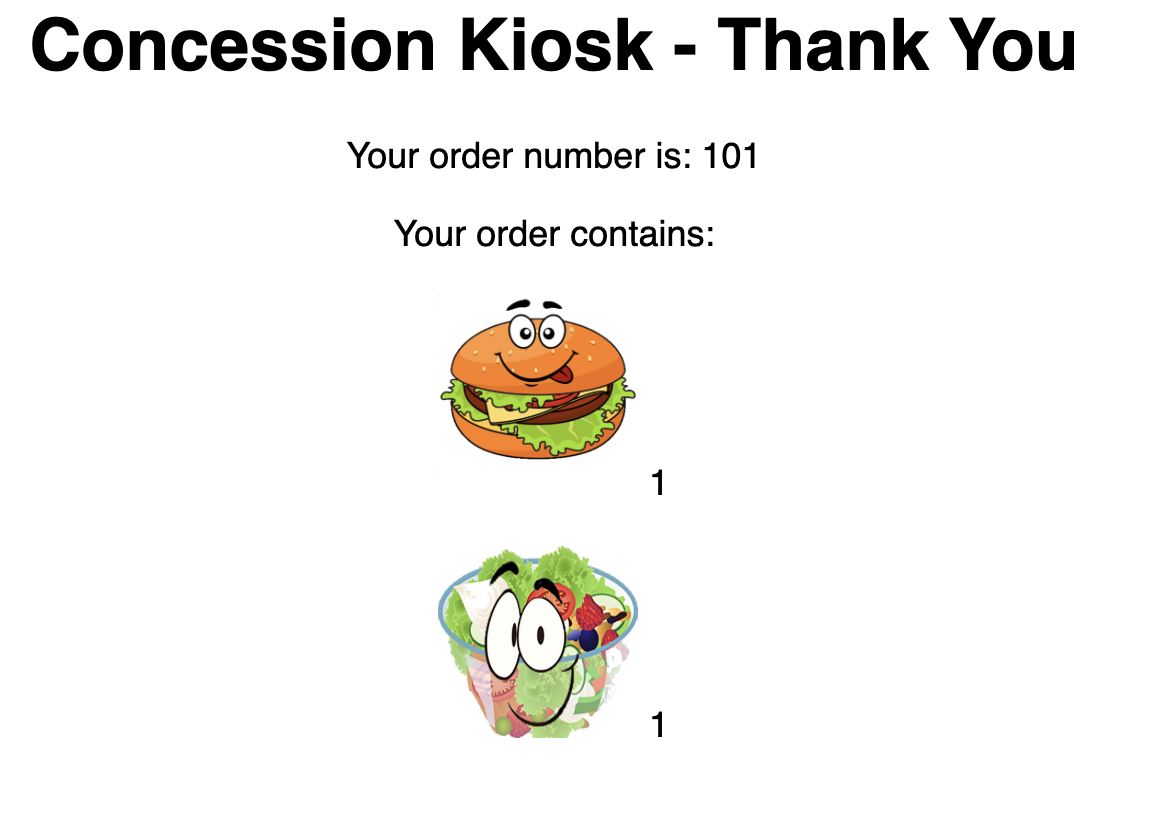
Test in the browser, you will see this screen.Place and order and confirm that you are getting an order number with order details:
Clean up
Run these commands to clean up your multi-tiered application.
-
Delete frontend component:
oc delete all -l app=kiosk-frontend
-
Delete backend component
oc delete all -l app=kiosk-backend
-
Delete database component
oc delete all -l app=mongodb-ephemeral
-
Delete database secret
oc delete secret mongodb
-
Delete project/namespace
| Substitute UserName before running the command |
oc delete project workshop-multitiered-YourName