$ oc new-project workshop-bluegreen-YourName --display-name="Blue Green Project" --description="Blue Green Project"
12 Blue/Green Deployments
Introduction
In this lab we will learn doing BlueGreen Deployments with OpenShift.
So what is Bluegreen?
Blue-green deployment is a release strategy that can be utilized by developers for deploying software in a production environment. Blue can be one particular production environment whereas green can define an identical production environment. Under blue-green deployment strategy, software developers are able to minimize downtime and reduce risk. 1*
In this Lab, we will be:
-
Deploying two versions of the same application. The first version will display a blue rectangle.
-
Create an OpenShift route (a FQDN) that can be used to expose the applications.
-
We will first expose the version 1, the blue version.
-
We will also create another version of this application in the same project that displays a green rectangle.
-
We will then switch OpenShift route from the first application (blue) to the second application (green).
Create a new project
Remember to substitute the YourName
Deploy Blue Version and Test
List existing image builder or image streams
$ oc new-app -S --image-stream=php
Image streams (oc new-app --image-stream=<image-stream> [--code=<source>])
-----
php
  Project: openshift
  Tags:    7.2, 7.3, latest
We will be using a sample php application that displays a blue or green rectangle. The sample app can be browsed at https://github.com/RedHatWorkshops/bluegreen
We have two branches blue and green . Version 1 uses blue branch and version 2 uses green branch.
$ oc new-app --image-stream=php --code=https://github.com/RedHatWorkshops/bluegreen#blue --name=blue
Fix the build resources
$ oc get builds

NAME              TYPE     FROM   STATUS    STARTED         DURATION
blue-1            Source   Git    Running   5 seconds ago

## If the build is still running, cancel it first:
$ oc cancel-build blue-1

## Afterwards, we need to patch the BuildConfig, which is the name of the build without the "-1"
$ oc patch bc/blue --patch '{"spec":{"resources":{"limits":{"memory":"1Gi","cpu":"1000m"}}}}'

## Now, start a new build
$ oc start-build blue

## You can check it's status again by running oc get builds
$ oc get builds
NAME              TYPE     FROM          STATUS                       STARTED          DURATION
blue-1            Source   Git@blue      Cancelled (CancelledBuild)   49 seconds ago   18s
blue-2            Source   Git@3b77b0a   Running                      4 seconds ago
Monitor the application build
$ oc get builds
NAME     TYPE     FROM          STATUS                       STARTED              DURATION
blue-1   Source   Git@blue      Cancelled (CancelledBuild)   2 minutes ago        11s
blue-2   Source   Git@3b77b0a   Complete                     About a minute ago   59s
Using the build name of the recently created application run:
$ oc logs build/blue-2
Once the build finishes you should see something similar to:
...
Pushing image image-registry.openshift-image-registry.svc:5000/bluegreen-user1/blue:latest ...
Getting image source signatures
Copying blob sha256:450cddac446d5cb2b7ab48687d2b43e9207fda7364bbfe320a757793d0ed9607
Copying blob sha256:4fbc3bafa3d4400bb97a733c1fe12f2f99bf38b9d5b913d5034f29798739654d
Copying blob sha256:1cd26fbb2b2181a18c41ece85dff8b293e399e50dc3abe227b1940450bf6298b
Copying blob sha256:34971b2d1eb98e410c2802e6bb3a7f499f9c5bff1b870ed329089ecdb21cf856
Copying blob sha256:0453406be68523ccc82999f84fffc57af64e00d9be0b75169c642c952b9bf7bc
Copying blob sha256:707235ac60367dff674607b0be2e18a83daea6dc2c8fb7330dbf7de29baf094b
Copying config sha256:59c852379e346ff3e3a28ca8210d6c6a3fb65f5cdab621eaf4b1c8ba2c6ddc96
Writing manifest to image destination
Storing signatures
Successfully pushed image-registry.openshift-image-registry.svc:5000/bluegreen-user1/blue@sha256:b870a5ea982
9f678c305deadb6dec69dbeb1e22fcf87498cc8ab49d2c36f82a4
Push successful
Once build is successful, you will see running pods.
$ oc get pods
NAME            READY   STATUS      RESTARTS   AGE
blue-1-build    0/1     Completed   0          2m35s
blue-1-deploy   0/1     Completed   0          25s
blue-1-rgrdm    1/1     Running     0          17s
Notice that the build pod has exited and you now have a single instance of the application running under one single pod.
List the service
$ oc get service
Note: While we are exposing the blue service, we are actually naming the route as bluegreen as we are going to do bluegreen deployments with the same route instance.
$ oc expose service blue --name=bluegreen
Look at the route that got created now
It should look something like this
$ oc get route
NAME        HOST/PORT                                               PATH   SERVICES   PORT       TERMINATION   WILDCARD
bluegreen   bluegreen-workshop-bluegreen-tim.apps.cluster.chp4.io          blue       8080-tcp                 None
Now test the application by copying your Route URL in the browser. You should see something similar to:
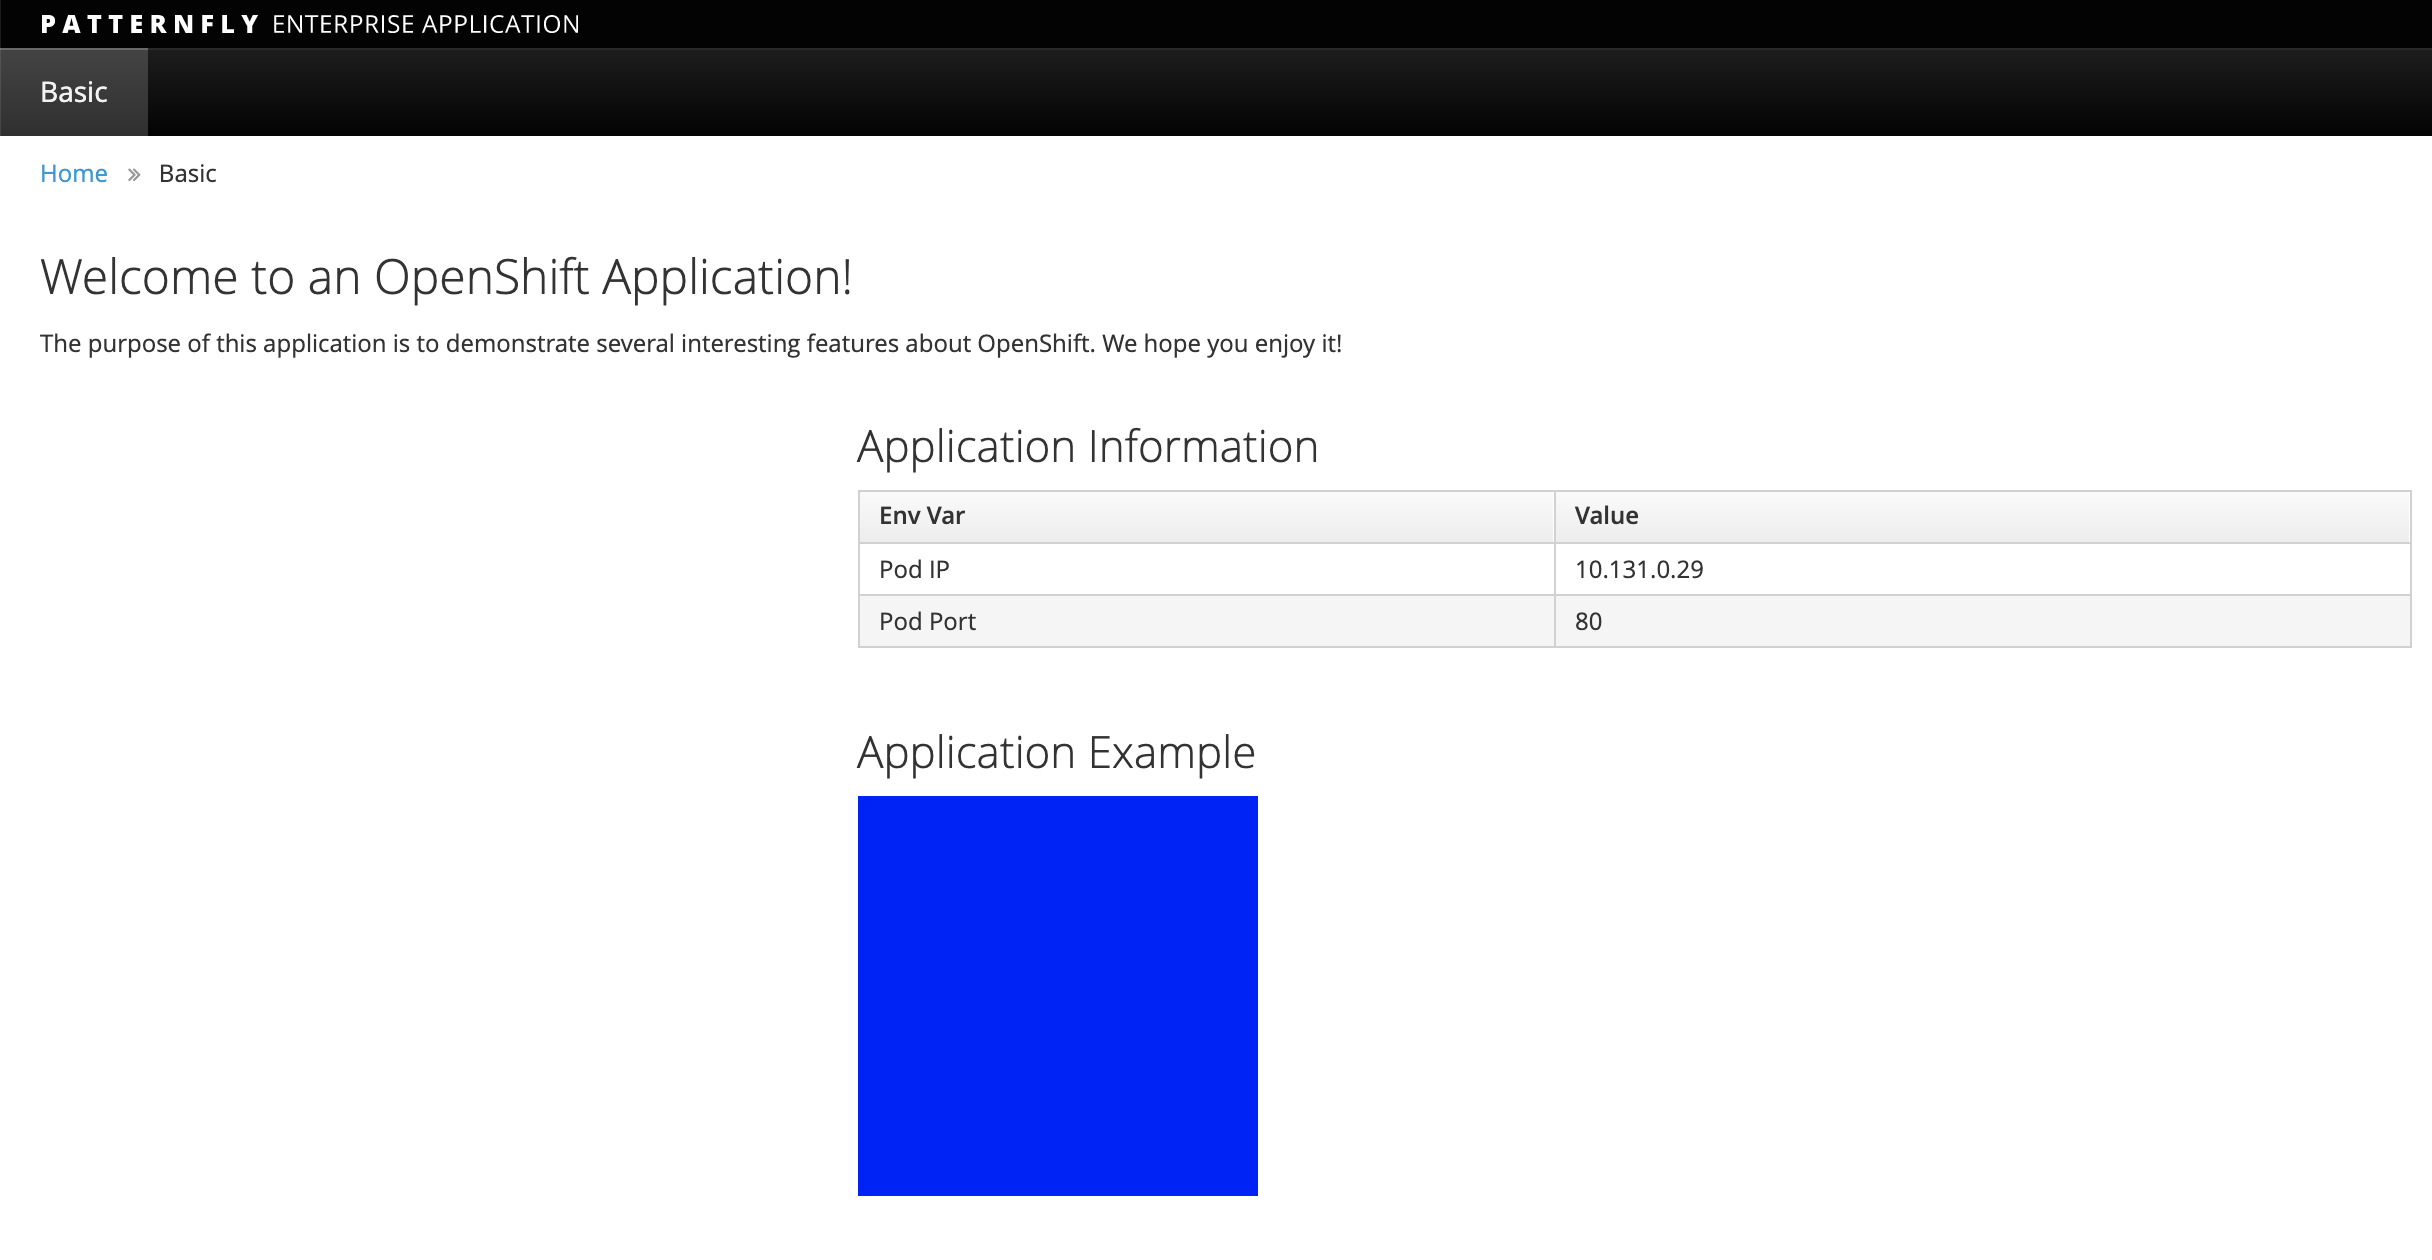
At this point you have deployed an application that displays for illustration purposes a blue rectangle for version 1.
Deploy Green Version
-
Deploy a new version of this application (Same one as before with a very small change)
-
Point the previously created FQDN (route) to the new service that will be created as part of the new application creation process.
Let us deploy new green version of the application in the same way we did blue version. Make sure to name the application as `green' this time.
$ oc new-app --image-stream=php --code=https://github.com/RedHatWorkshops/bluegreen#green --name=green
-
Fix the build resources
$ oc get builds

NAME      TYPE     FROM          STATUS                       STARTED          DURATION
blue-1    Source   Git@blue      Cancelled (CancelledBuild)   5 minutes ago    11s
blue-2    Source   Git@3b77b0a   Complete                     5 minutes ago    59s
green-1   Source   Git@7ac4dc0   Running                      44 seconds ago   38s

## If the build is still running, cancel it first:
$ oc cancel-build green-1

## Afterwards, we need to patch the BuildConfig, which is the name of the build without the "-1"
$ oc patch bc/green --patch '{"spec":{"resources":{"limits":{"memory":"1Gi","cpu":"1000m"}}}}'

## Now, start a new build
$ oc start-build green

## You can check it's status again by running oc get builds
$ oc get builds
NAME      TYPE     FROM          STATUS                       STARTED          DURATION
blue-1    Source   Git@blue      Cancelled (CancelledBuild)   5 minutes ago    11s
blue-2    Source   Git@3b77b0a   Complete                     5 minutes ago    59s
green-1   Source   Git@7ac4dc0   Cancelled (CancelledBuild)   44 seconds ago   38s
-
Wait until the application is built and deployed. You should now see two services if you run:
$ oc get svc
NAME    TYPE        CLUSTER-IP       EXTERNAL-IP   PORT(S)             AGE
blue    ClusterIP   172.30.240.196   <none>        8080/TCP,8443/TCP   15m
green   ClusterIP   172.30.128.91    <none>        8080/TCP,8443/TCP   12s
Switching from Blue to Green
Check the route again and note that it is still pointing to blue service.
$ oc get routes
NAME        HOST/PORT                                               PATH   SERVICES   PORT       TERMINATION   WILDCARD
bluegreen   bluegreen-workshop-bluegreen-tim.apps.cluster.chp4.io          blue       8080-tcp                 None

$ oc set route-backends bluegreen
NAME              KIND     TO    WEIGHT
routes/bluegreen  Service  blue  100
The command oc set route-backends will show how the traffic is flowing from the route to the backend service.
Now let us change the route to send all the traffic to green by running
$ oc set route-backends bluegreen green=100
route.route.openshift.io/bluegreen backends updated
So by doing this we updated the route named bluegreen to send all the traffic to green service backend.
You can confirm the change is made in two ways
$ oc set route-backends bluegreen
NAME              KIND     TO     WEIGHT
routes/bluegreen  Service  green  100

$ oc get route bluegreen
NAME        HOST/PORT                                               PATH   SERVICES   PORT       TERMINATION   WILDCARD
bluegreen   bluegreen-workshop-bluegreen-tim.apps.cluster.chp4.io          green      8080-tcp                 None
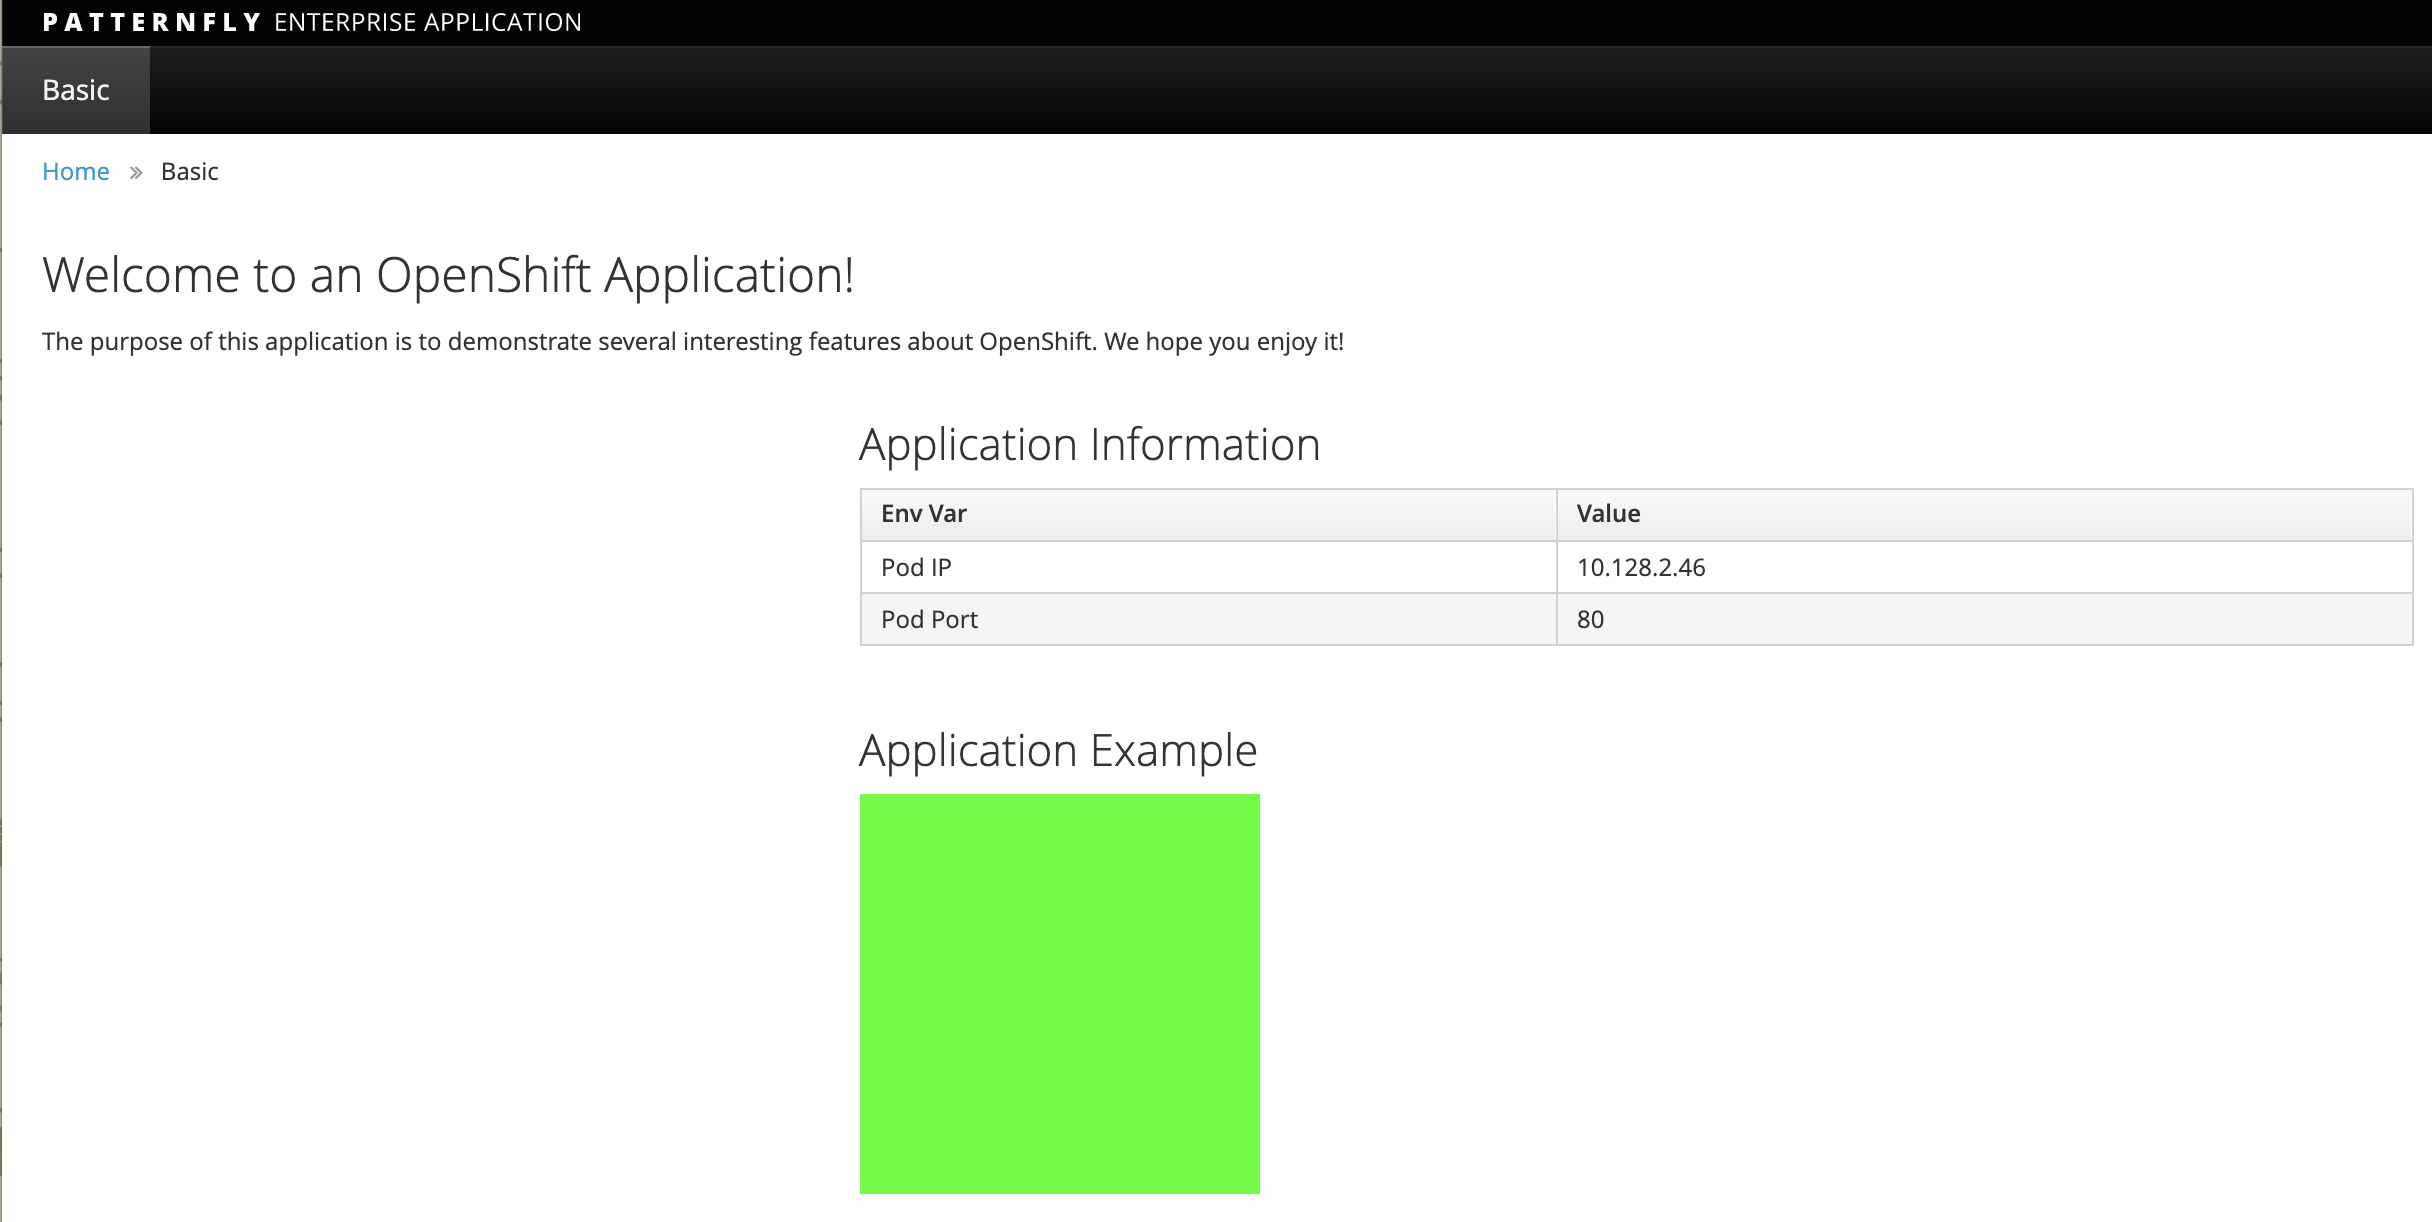
Let us test the application by using th same route in the browser
You should now see the new version of the recently deployed application with a green rectangle as below.
Clean up
-
Delete application
oc delete all --all
-
Delete the project; substituting the YourName in the command below
oc delete project workshop-bluegreen-YourName
Summary
-
Blue-Green deployments can be easily accomplished on OpenShift.
-
We have shown multiple versions of an application; all running concurrently, each with a unique service.
-
All that is needed to expose any of the applications is to change the service being used by the route to publicly advertise the application.
-
You can split traffic across two services